0
items
$0
Learn top drawing secrets from 4 masters of interior sketching which can instantly improve your sketch (plus, get why all Art Academies teach their students to copy works of old masters?)

In this article, I will tell you about four world gurus of sketching and will acquaint you with their techniques. You will also learn why Art Academies insist that their students do copies of the masters and of what use this may be to us. This text I took from my best-selling book “The SKETCH“.
P.S. Exceptional gift at the end of the article.
Gurus of sketching
When you are starting to learn something, it is of key importance that you learn from the best in the field – this way, you will set yourself a good benchmark from the outset to strive towards. In this book, I would like to tell you about four world-class masters. Each one of them has his unique style, expression and techniques, which can be identified, analysed, and deployed in your practice.
Always ask yourself: What is it that I like so much about this sketch/drawing/artist/project?
Be observant and attentive, be the constant questioner, look beyond the first impressions, pay attention to details, always try to get to the heart of the matter. Ask yourself: “ What is so special about this work?” Is it the well-chosen palette, or delightful light effects, or, maybe, unconventional drawing techniques? Always study, train your brain to analyse, and your eyes to observe. Having figured out the technique, use it in your drawing, play with it, find out how much it is to your liking, whether it is your thing or not. In this case, the goal is not to copy the style of an artist, and not to imitate the technique thoughtlessly and indiscriminately in your drawing; the goal is to experiment with a technique, try your hand at it, reveal your personality through it. This is how a new technique will eventually emerge, which will be inimitable and entirely your own. We are all different, and drawing reflects our personalities. Freehand drawing vividly reveals and brings out the unique character of a person. No other human being thinks, feels, analyses, and draws in absolutely the same way.
Why all Art Academies teach their students to copy works of old masters?
Talking about copying: why do you think all Art Academies teach their students to copy works of old masters (e.g., Rubens, Leonardo, and Michelangelo)? Moreover, copying is an essential part of their curriculum. This is the reason: the most amazing thing happens when a student copes a work of a great master – he comes into contact with the way of thinking of the genius. In imitating the strokes of the master, your hand sends signals to your brain, and you start to understand the thought process that went into creating a particular painting. You follow the movements of his pencil, and, therefore, of his thought. Automatically, your hand starts to memorize effective techniques and methods. You start getting a better grasp of proportions, a well-chosen angle view, and well-arranged compositions. By doing so, you are developing the so-called “body memory”. Your hand gives the brain a whole new picture of the world, and that’s how your unique n technique evolves, it starts developing times and times faster, it becomes very confident because it acquires a great capacity of old masters.
We are going to try the same thing. Let’s examine a few works by sketch masters from various countries, who are undoubtedly the gurus of sketching and who have spent years developing their skills. Let us examine the works of these masters coming from different parts of the world.
1. Richard Chadwick
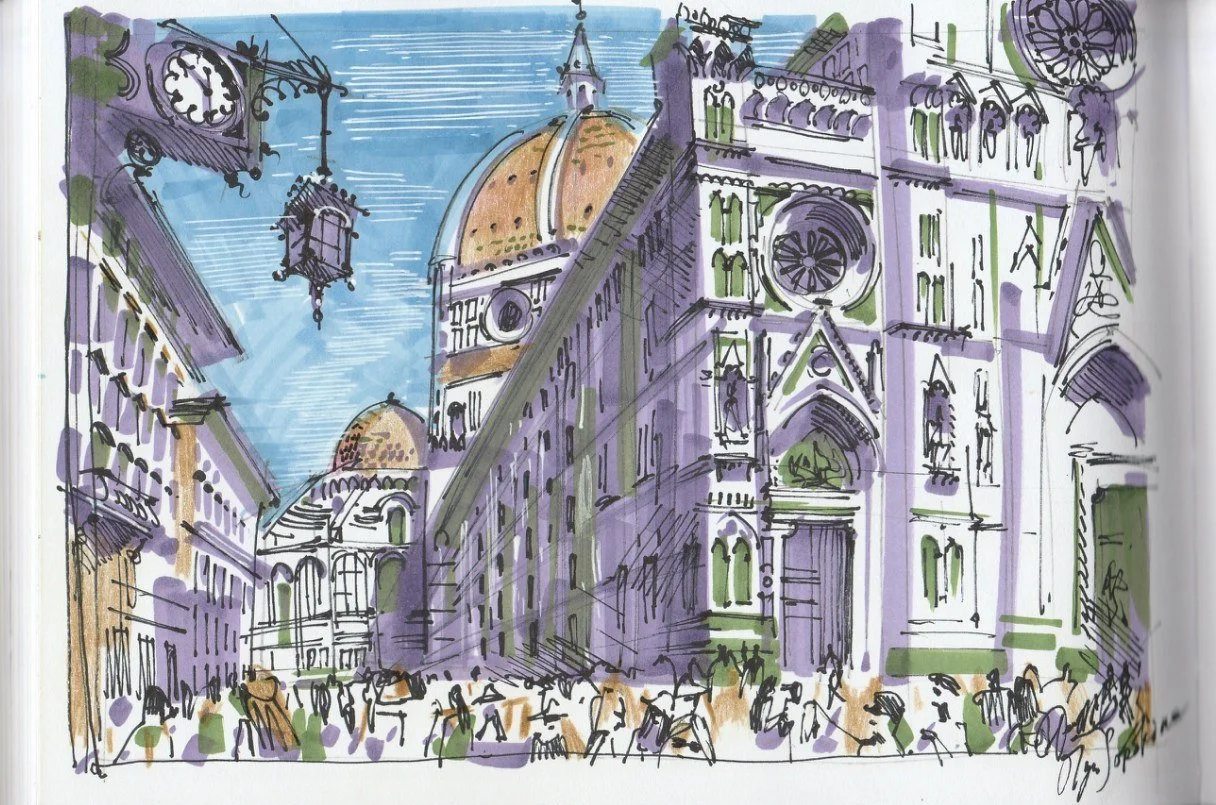
Here comes the first master that I want to introduce you to, Richard Chadwick. He comes from Manchester. I would like to quote here his words about the art of sketching:
As an antidote to the ubiquitous – and to my mind anodyne – computer-produced visuals, these are all drawn by hand, mainly pen and marker renderings, capturing the energy of the moment and generally looking far more dynamic than anything produced by a computer programme. A return to handcrafted values offers a way forward from an entirely technologically based society, and the tactile feel of pencil on paper has its own reward.
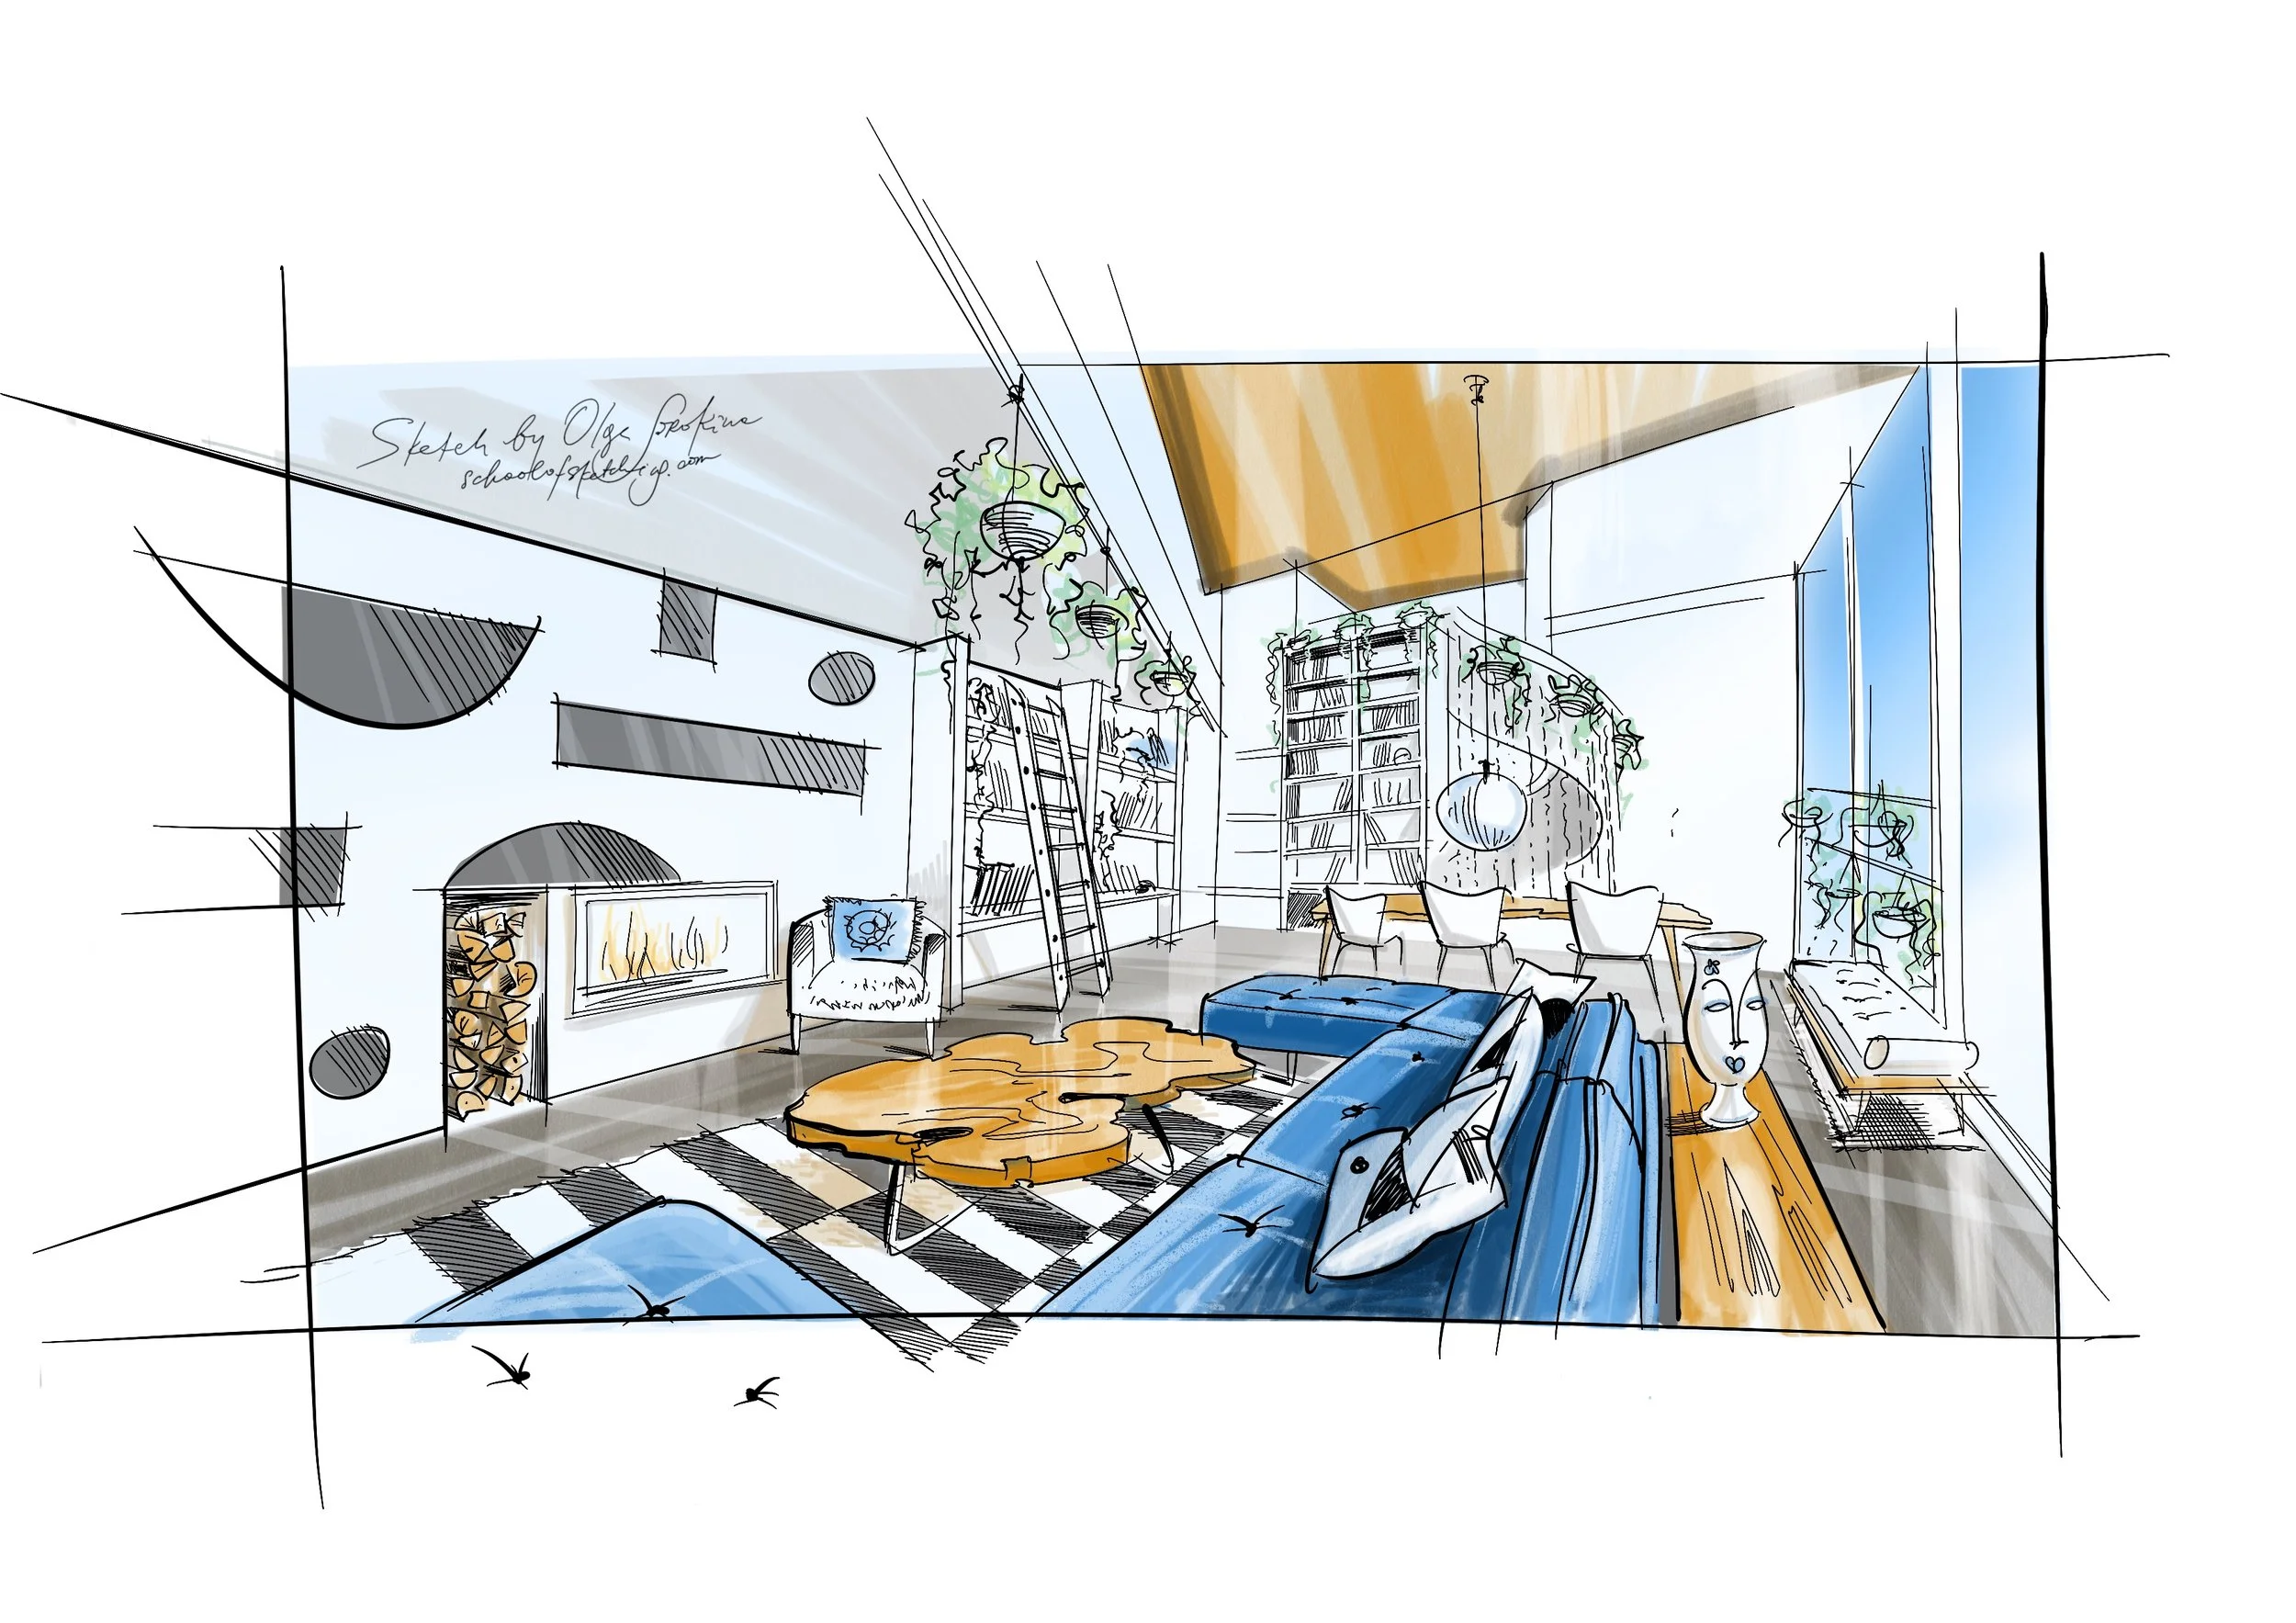
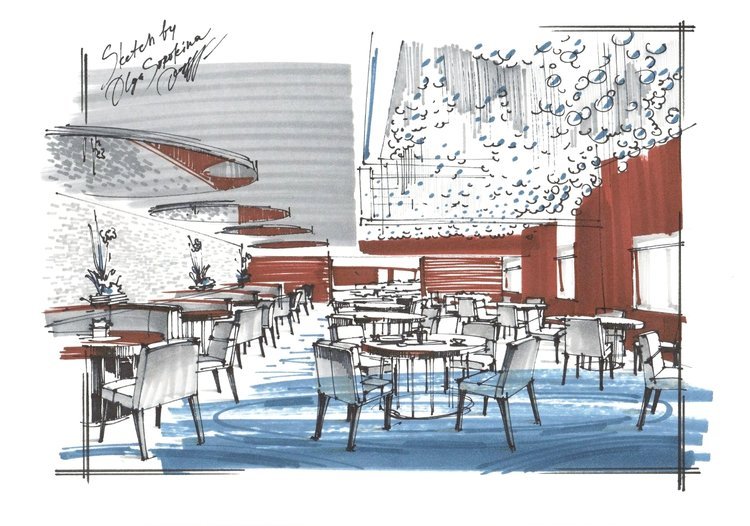
Chadwick has been in the profession for many years. He worked both as an architect and as an interior designer. Now Richard mostly focuses on freehand visuals. In his interviews, he says that he usually uses A3 sheets of paper for drawings and spends 2 to 3 hours on a drawing on average. You can see that this is extremely quick as compared to a rather lengthy process of 3D visualization. His sketches are so very full of life and energy! His portrayal of the feel, the ambience of a place is splendid.
What is special about Chadwick’s technique? Markers, partial colour filling, focusing on the central part of the composition, freehand lines, no rulers. No less important is the speed. His lines are very free, never perfectly straight, and sometimes, even they are slightly bent, give the overall composition the “fish eye lens effect”.
Chadwick’s knowledge of perspective principles is so profound that he does not hesitate to break them to achieve his vision. Sometimes you will find several horizon lines in his drawings, and the diagonals often do not meet at the vanishing point; despite all that, his drawings always feel correctly constructed and full of emotionality, liveliness, and dynamism.
What can you try to do the way Chadwick does? As a rule, it is the focal point of a drawing (its background) that he fills with colour, whereas the foreground could be executed in thin lines. Try to identify one sort of your overall composition and focus on colouring only the central part. By applying colour only to certain parts of a drawing, you will save both time and markers. An attractive trait of his drawing is that when Richard Chadwick makes textures and works over detail, he shows only fragments of them (for example, only fragments of tiling on the floor). This is the most effective application of the ‘understatement’ technique, and lots of areas in his drawings are only marked with thin lines. The master uses a minimal colour palette in one sketch, which is usually 5 to 7 markers. More about Chadwick here.
Here are Chadwick’s favourite subjects: bars, restaurants, cafes.
Homework: do a copy of 1-2 of Chadwick’s interior sketches as this will help you to acquire a quick and impressive drawing technique. Carefully observe and analyse everything that he does as go along.
2. Sergio Rodrigues
Our second master is a furniture designer and architect Sergio Rodrigues. He is a legend in Brazil, and his work is recognised all over the world. More about Rodrigues here.
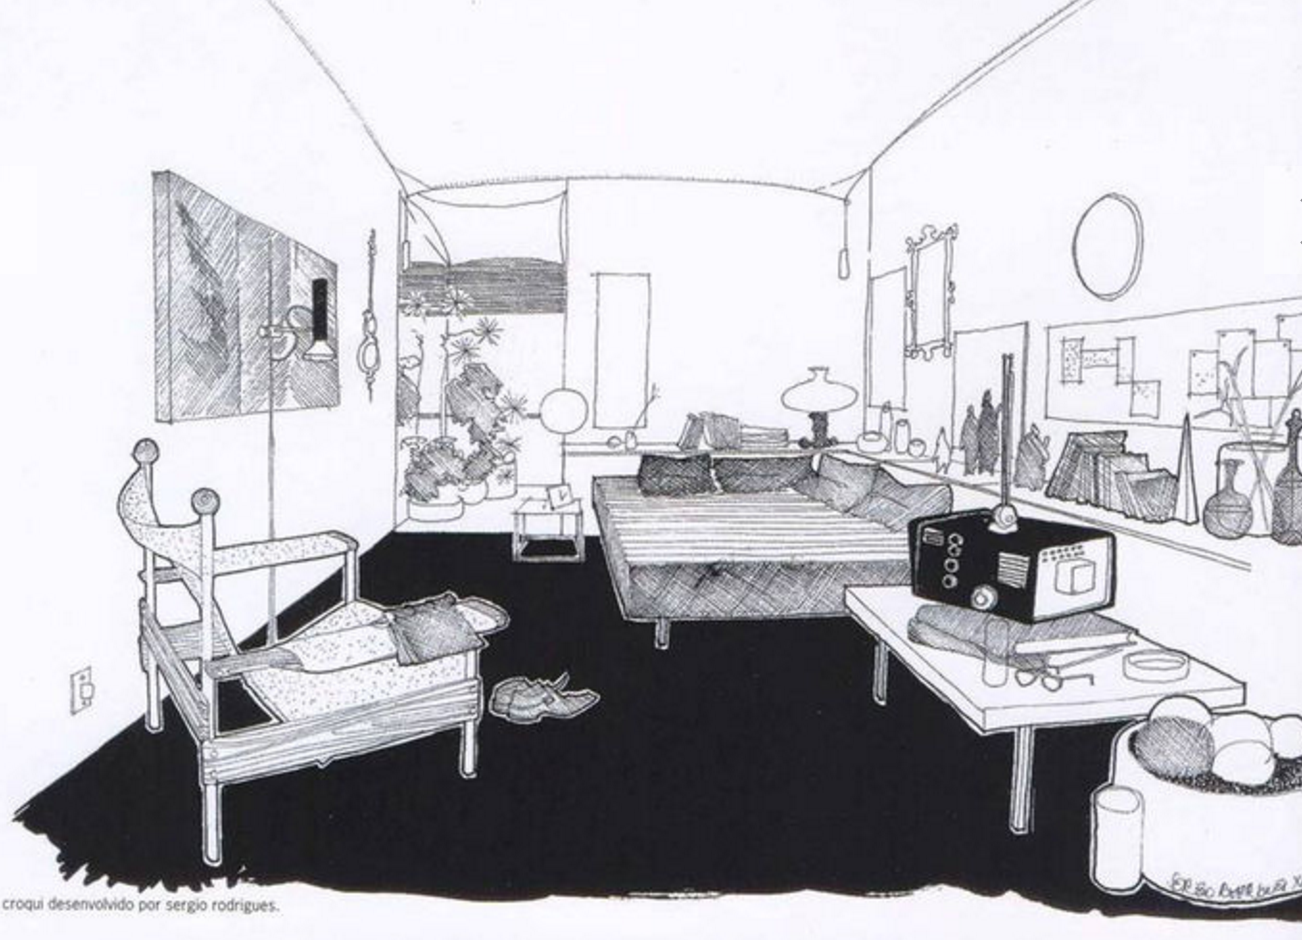
Technique, practical training: favourite materials of the master are liners, black Chinese ink, sometimes watercolour. His drawings are very expressive, and their energetic graphics fall into the category of interior illustrations. His technique very much resembles ‘the wirework’ method, where all objects are carefully inked over contour and detailed.
Contributions to your collection of techniques: notice how Rodrigue’s drawings have distinct foreground and background. The lines of the objects in the foreground are thick and rich in colour, whereas in the background lines are lighter. Notice how he applies flat colour to the floo (check the drawing below), and by doing so, he accentuates the contrast and graphic feel of his sketches.
Favourite subjects: restaurants, bars, residential, furniture.
Homework: analyze the master’s technique, do a copy of one of his works.
3. Albert Hadley
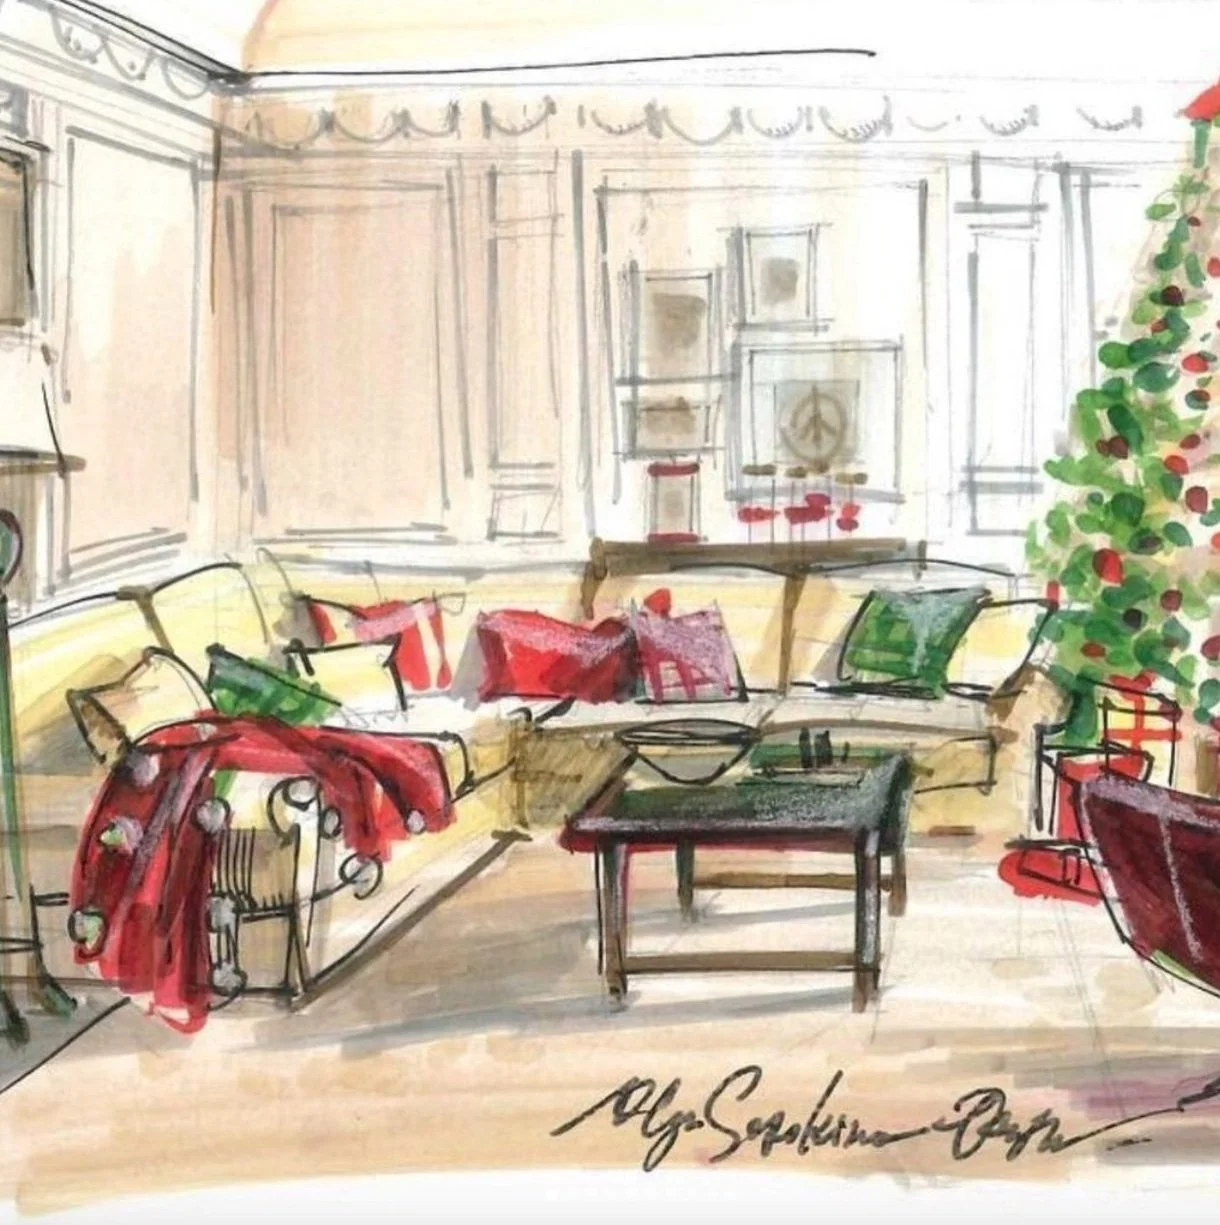
One of the best-known American decorators of all time, Hadley worked for such celebrity clients as Jacqueline Kennedy, Oscar de la Renta, as well as vice-presidents and ambassadors. Hadley played an exceptional role and made a significant contribution to the XX-th century American interior design. More about Hadley here.
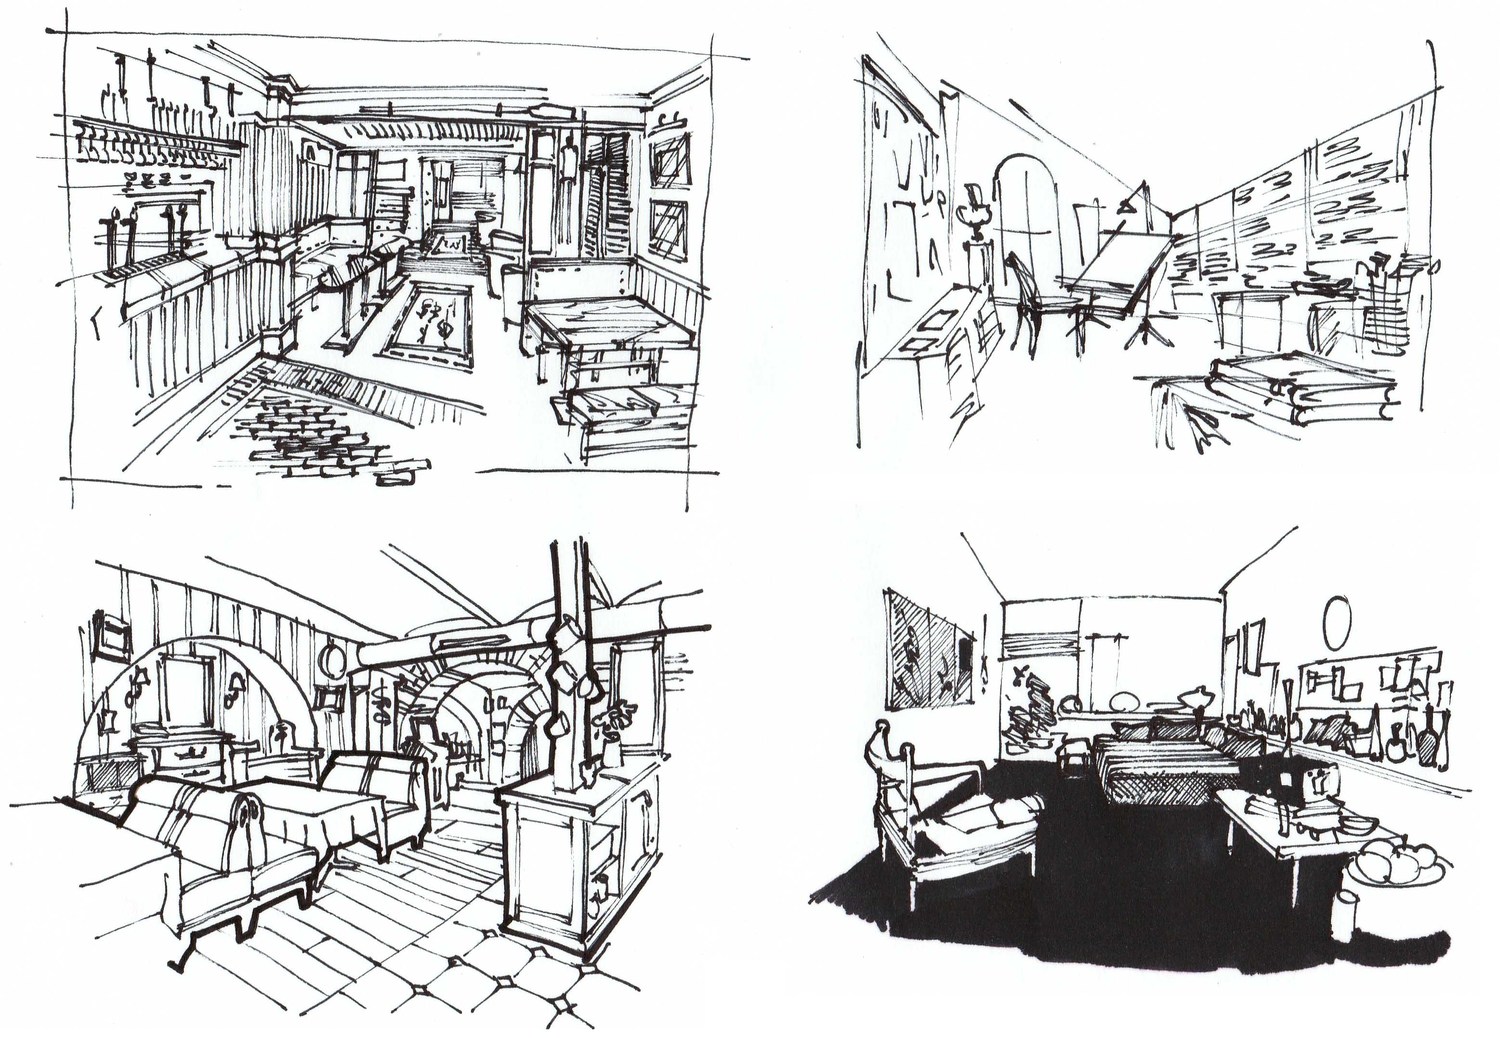
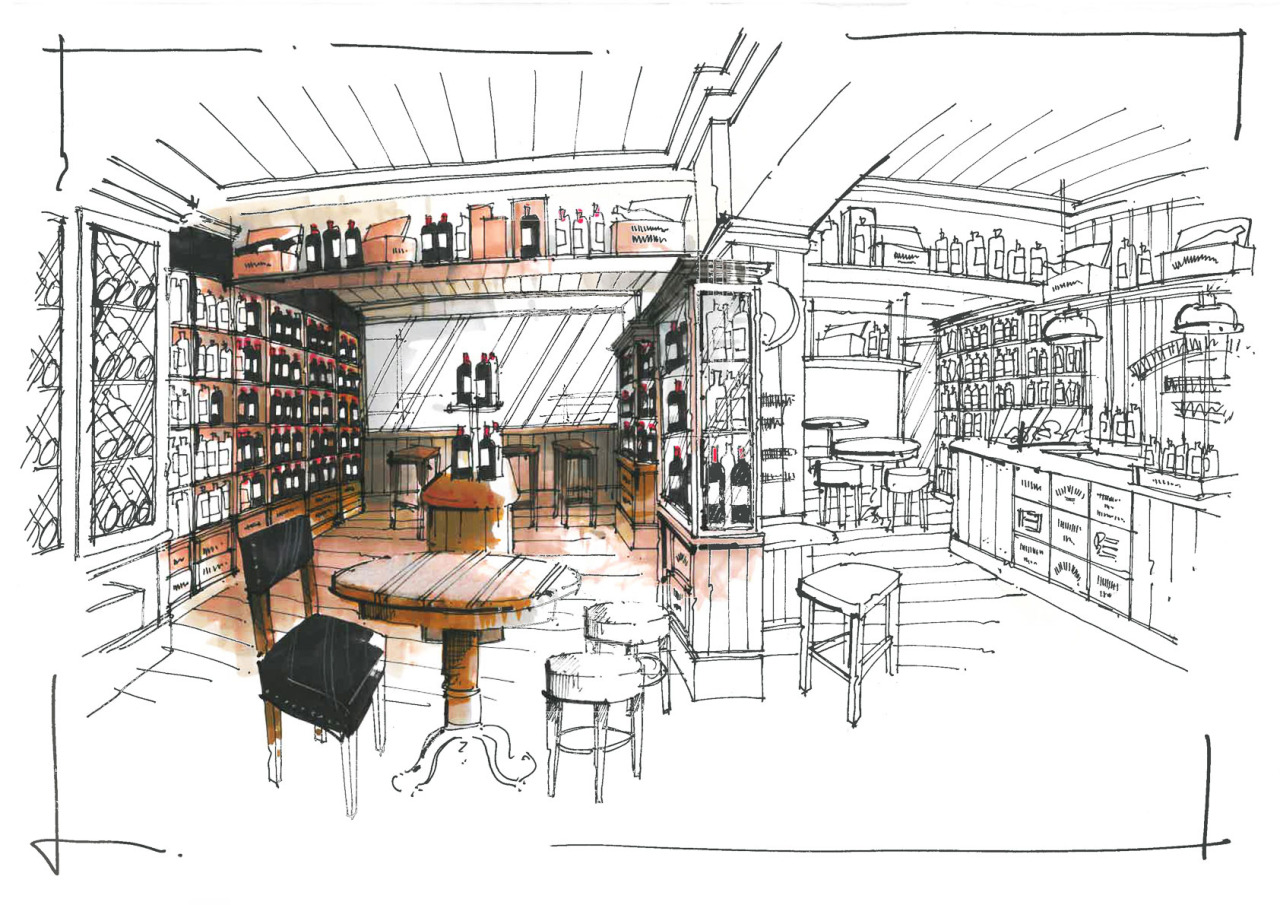
The technique, practical training: sketches made by the master are, for the most part, very graphic in style and are executed in pencil, Chinese ink, and stylus. Albert Hadley usually used toned drawing paper and was famous for his incredible speed of drawing. He had his sketches finished in a matter of seconds; this proves his great mastery – speed and accuracy of performance. Have a look at his drawings. How vigorous, energetic, fluent and lucid they are, and, at the same time, how exceptionally well he renders an idea and feel of a prospective interior, the ambiance of a space.
Contributions to your collection of techniques: Albert Hadley never used rulers or rubbers when drawing. This can teach us a good lesson – try and learn to render your idea on paper in the quickest, clear-cut, articulate, and expressive way, almost with one stroke of a pen.
Favourite subjects of sketches: interiors of Victorian houses, libraries.
Homework: do a copy of one of the drawings by the master using a liner or pen.

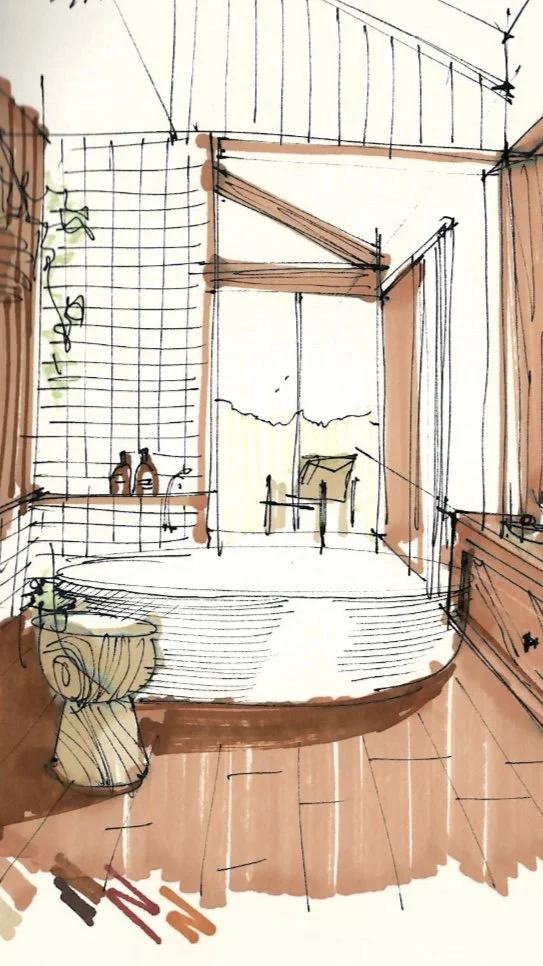
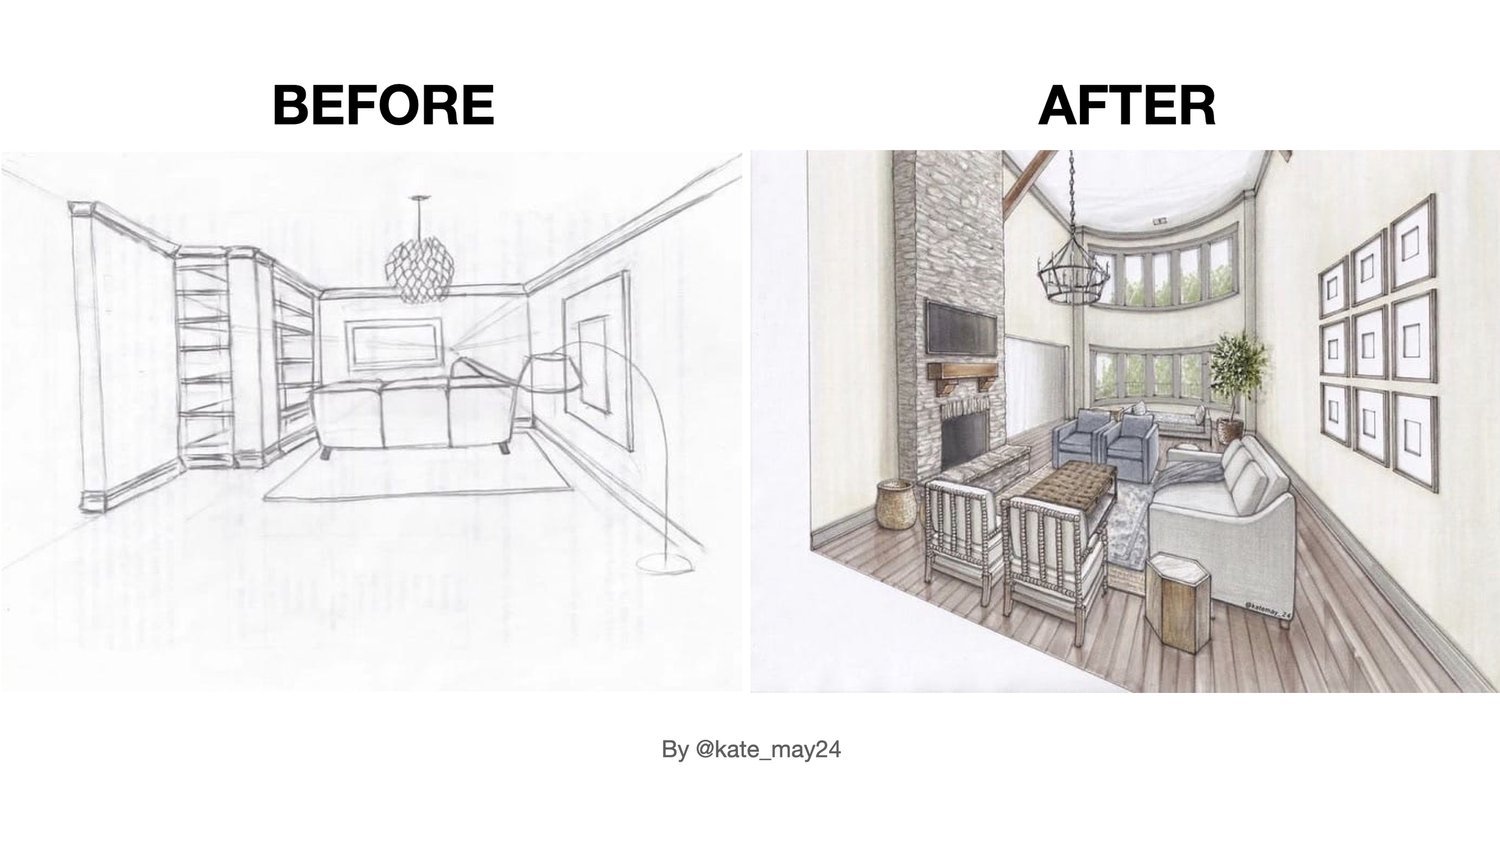
4. Michelle Morelan
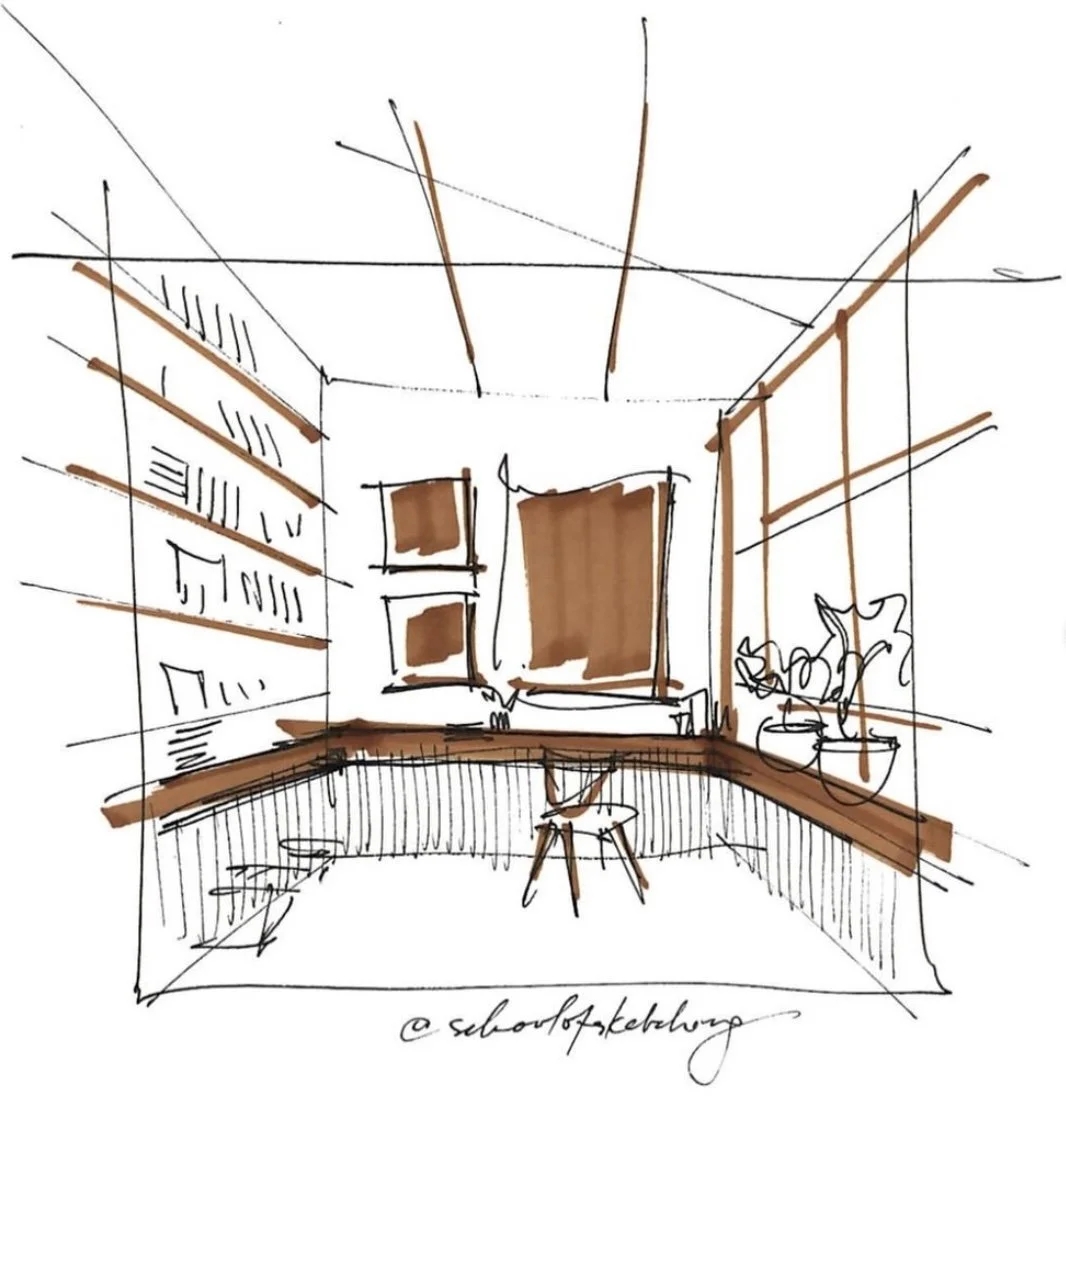
And to finish our list of gurus for this article, let me introduce to you a Canadian woman-designer Michelle Morelan. She grew up on the West Coast of Vancouver Island, and early on, she understood how the aesthetics of nature and architecture intertwine in harmony to a profoundly satisfying effect. This is the reason why peace and tranquility of natural way of living have found their way into all of her drawings with accentuated textures, natural materials, open spaces, and enjoyable colour palette, mostly consisting of sandy, earthy and woody shades. More about Morelan here.
Technique, practical training: the master uses a combination of techniques to create "hybrid" sketches. As a rule, she constructs a space in a 3D programme (such as “Sketch Up”), and then she hand-sketches and colours interesting angles of perspective with markers.
Contributions to your collection of techniques: like Chadwick, Michelle Morelan has a very restrained colour palette. I would call her technique “minimalistic sketching”: often, only one or two materials are accentuated (frequently these are wood and stone).
Favourite subjects of sketches: spacious interiors of countryside houses.
Homework: do a copy of one of Morelan’s sketches.

P.S. Well, my dear creative, I hope you enjoyed this article, please share it on your social media. Thanks in advance and good luck with your drawings!
© Olga Sorokina, 2019

Dream to draw interior sketches like a professional? Watch this tutorial on my YouTube and master some basics today:
Here is your very special gift!
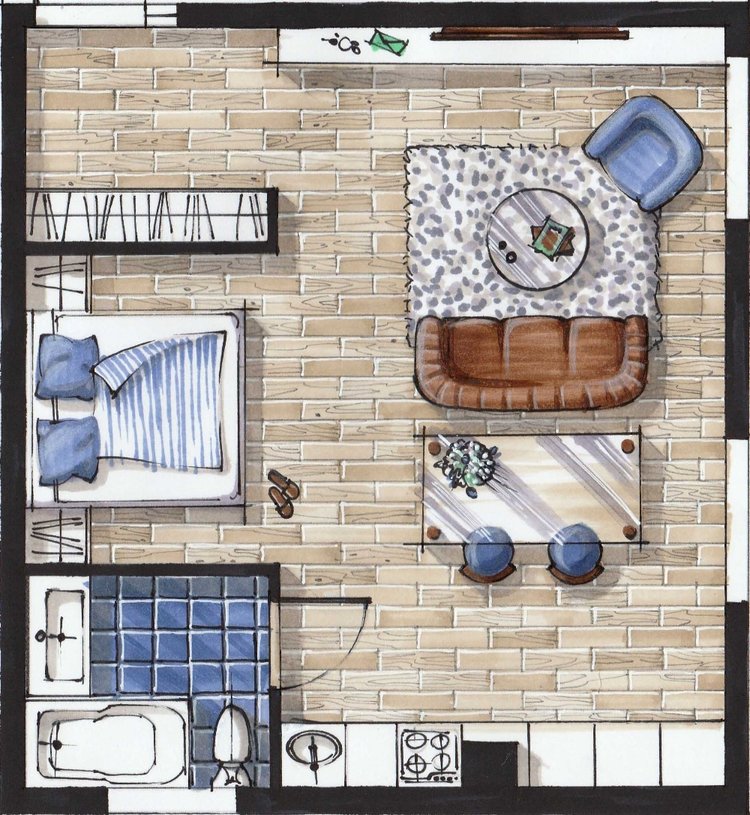
Now you can get this 15+ pages Sketch-plan PDF workbook for free and master 10 easy steps of creating such a beautiful layout plan:

Read other articles on my blog:
Featured